TLDR
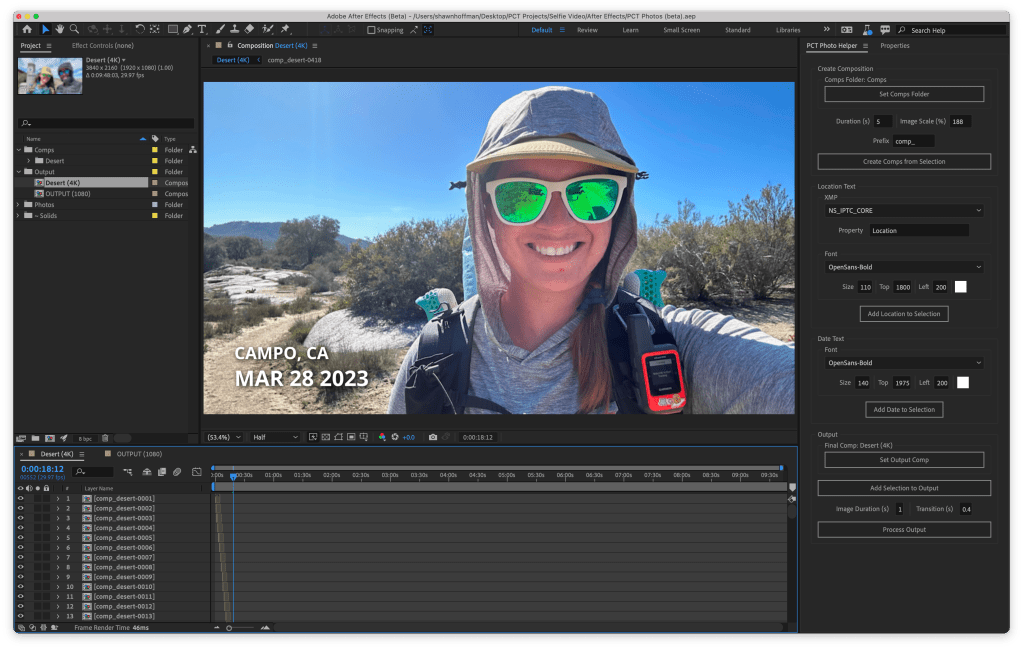
Madison wanted to make a video of PCT selfies with the date and location on them. I couldn’t find an app to do what we wanted, so I dove into custom scripting for Adobe After Effects and created a plugin to make it super easy.
Here’s a link to the GitHub Repo…
How it started…
As some of you may already know, my partner, Madison, hiked the Pacific Crest Trail this summer. When she previously hiked the JMT, she came back with a compilation video of selfies that she had taken every mile of the trail. She made it manually, photo by photo. It turned out well enough, so she wanted to do it again. While the JMT is 211 miles, the PCT is over 2,600. That many selfies would be impossible to do manually.
All those selfies would also be difficult to get a grasp on if they were simply dumped into a video. The One Second Everyday app that she uses to compile the last year of seconds inspired a way to convey each selfie’s place in the journey as a whole: include the date and approximate location for each photo.1 A year is a long time and the way the app adds the date of every recording and the location gives context to the passing time. At first, she tried to use the app with the images she’d taken. Since they were all live photos, the app treated them as videos (showing the entirety of the live photo) instead of pictures (just the still image).
Knowing that I like to work on goofy projects like this and have a passing familiarity with Adobe products, I took the baton and told her I’d figure it out…
Breaking it down…
From the start, I knew that there were essentially 2 main problems that I needed to figure out:
- How to quickly take the GPS information embedded in many photos and associate it with a nearby town/city.
- How to take that same photo collection and bulk-add it to a video editor, end-to-end, with date and location data overlayed. Bonus points if I could figure out how to automatically add transitions.
I decided to start with the GPS stuff first since that would be the make-or-break for the entire project. If I can’t figure out where the photo was taken, then the whole thing is pointless.
GPS to City, State
Starting here felt safe since it’s familiar territory and didn’t involve any video stuff. Other apps can take a photo and display a location, so I knew there had to be a service or lookup that made it possible. I didn’t want to pay for any of this information, so I was nervous that I couldn’t do it.
Luckily, I stumbled upon GeoNames.org, a website that provides a massive collection of geographic data for free. Sweet! From there, I found an API call that performs reverse geocoding to return a nearby toponym2. Basically, you give it a latitude and longitude, and it will return some information on a nearby town. Bingo!
{
  "geonames": [
    {
      "adminCode1": "CA",
      "lng": "-116.46891",
      "distance": "1.86498",
      "geonameId": 5333749,
      "toponymName": "Campo",
      "countryId": "6252001",
      "fcl": "P",
      "population": 2684,
      "countryCode": "US",
      "name": "Campo",
      "fclName": "city, village,...",
      "adminCodes1": {
        "ISO3166_2": "CA"
      },
      "countryName": "United States",
      "fcodeName": "populated place",
      "adminName1": "California",
      "lat": "32.60645",
      "fcode": "PPL"
    }
  ]
}
From here, I was off to the races. I slapped together a quick NodeJS script (I’m not proud of so don’t judge me) that loops over every image in a folder, grabs the GPS data from the photo, uses them in the API above, and then saves the returned location in a nice clean format (e.g., “Campo, CA”) back on the photo.
const nearby = await geonames.findNearbyPlaceName({
  lat: imageTags.GPSLatitude,
  lng: imageTags.GPSLongitude,
  fcode: 'PPL',
  cities: 'cities1000',
  style: 'long',
});
I was pumped that I had gotten it to work quickly, but I noticed something odd. Given how remote Madison was when taking these photos, some of them lacked GPS information. Also, some would go back and forth between 2 towns when the trail got close to a township boundary. I settled on simple fixes for both of them. I would simply use the town information from the previous photo for missing GPS data since it was close enough, and most towns lasted a minimum of 5-6 pictures. When I ran into the boundary issue, I started implementing some complicated logic that would balance them out but removed them in favor of manual intervention since it felt clean and had fewer false positives.
Now that everything was running smoothly, I needed to persist the location data in a way that could be easily consumed by whatever I would use to make the video portion. I landed on using a similar but different (and empty) metadata tag to save it back on the original photo. Initially, I did this because I didn’t know what else to do with it, but it was the right idea in the end. I’d accomplished what I came to do and could make the necessary adjustments once I figured out what was possible on the video side.
Now, it was time for the hard part…
Automating the Video…
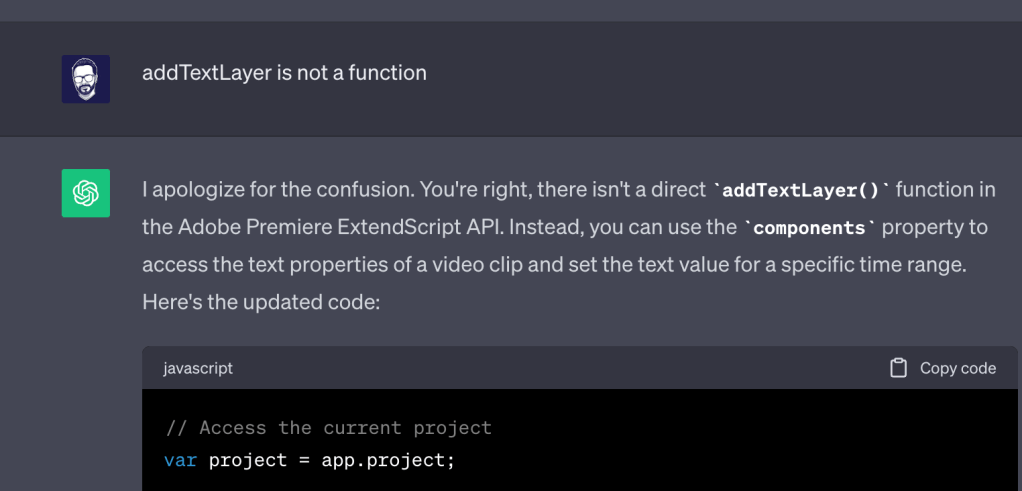
Conceptually, I knew what I wanted to do but needed to figure out how. I’ve created many videos as a hobbyist, so I’m moderately familiar with the concepts in Adobe Premier and After Effects. I wasn’t sure if any of this was possible, so I decided to try something new; I asked ChatGPT how to do it, and it introduced me to ExtendScript. ExtendScript is similar to JavaScript but designed to integrate with Adobe products. The documentation is abysmal, and it wasn’t easy to sort through what it could do. After coming across a GitHub/YouTube account, NTProductions, I was able to use their snippets to sort it all out.
I knew Madison wouldn’t have everything together all at once, so I opted for flexibility. I would build a UI that allows me to automate small pieces quickly and easily if we need to make changes. If I automated everything simultaneously, making the text slightly bigger would be a 5-minute wait time. Basically, I decided to break it down into the following steps:
Create an individual composition for each photo in a folder.
- I would have folders for all of photos in each section (e.g. desert, sierras, etc).
- The composition3 would simply contain a single photo to start.
- Later, I would add a solid black background behind the photo as well, just in case she wanted to display the entire photo and the video/photo aspect ratios were different.
var name = getFileNameWithoutExtension(item.name);
var compName = createPrefix.text + name;
var duration = Number(createCompDuration.text);

var scale = Number(createLayerScale.text);
var height = finalComp.height;

// Create the comp
var compItem = compsFolder.items.addComp(
	compName,
	finalComp.width,
	height,
	finalComp.pixelAspect,
	duration,
	finalComp.frameRate.toFixed(4)
);

// Add the image
var layer = compItem.layers.add(item);
layer.startTime = 0;
layer.duration = duration;
layer.scale.setValue([scale, scale]);
layer.name = name;
Add a text layer to the composition with the retrieved location metadata
Initially, this would be the only text there, but Madison later asked if we could also add the date.
// GET THE LOCATION DATA FROM THE IMAGE
var imageLayer = comp.layers[comp.numLayers - 1]
var fsName = imageLayer.source.file.fsName

var xmpFile = new XMPFile(fsName, XMPConst.FILE_UNKNOWN, XMPConst.OPEN_ONLY_XMP)
var xmp = xmpFile.getXMP()
var locationProp = xmp.getProperty(XMPConst[selectedXmpNs.selection.text], xmpProperty.text)

if (!locationProp) {
  return
}

var location = locationProp.toString()

// CREATE THE TEXT LAYER
var startTime = 0
var endTime = comp.duration

var distanceFromTop = Number(textLocationTop.text)
var distanceFromLeft = Number(textLocationLeft.text)
var position = [distanceFromLeft, distanceFromTop]

var textLayer = comp.layers.addText(location)
textLayer.startTime = startTime
textLayer.inPoint = startTime
textLayer.outPoint = endTime
textLayer.name = 'LOC - ' + location
textLayer.property('Position').setValue(position)
var sourceText = textLayer.property('Source Text')
var sourceDoc = sourceText.value
sourceDoc.fontSize = Number(selectedFontSize.text)
sourceDoc.font = selectedFontFamily.selection.text
sourceDoc.fillColor = colorColorColorLocation
sourceText.setValue(sourceDoc)- Later, I would add some functionality that adds a drop shadow effect to the text to make it more visible on the different photos.
var stylesProperty = 'Layer Styles'
var shadowProperty = 'Drop Shadow'
var dropShadowCommandId = 9000

textLayer.selected = true
// Execute the menu command. You can't do this through code.
app.executeCommand(dropShadowCommandId)
var ds = textLayer(stylesProperty)(shadowProperty)
var scale = textLayer.height / 1080
ds('Opacity').setValue(100)
ds('Size').setValue(17 * scale)
ds('Distance').setValue(5 * scale)

if (app.project.selection && app.project.selection[0].id !== comp.id) {
	closeComp(comp)
}Add a text layer with the date the photo was taken
This was the same as the location data, but I had to grab the CreateDate instead.
var xmpFile = new XMPFile(fsName, XMPConst.FILE_UNKNOWN, XMPConst.OPEN_ONLY_XMP)
var xmp = xmpFile.getXMP()
var dateProp = xmp.getProperty(XMPConst.NS_XMP, 'CreateDate')

if (!dateProp) {
  alert('No creation date found in image metadata')
  return
}

var dateString = formatDateString(dateProp.toString())
Add all the compositions in a folder as individual layers in an “output” composition.
Now that all of the individual compositions were good to go. I needed to combine them to transition between them without mucking up the photo and text stuff.
function addCompToComp(comp, destComp) {
$.writeln('Adding comp (' + comp.name + ') to comp (' + destComp.name + ')')
var newLayer = destComp.layers.add(comp)
newLayer.moveToEnd()
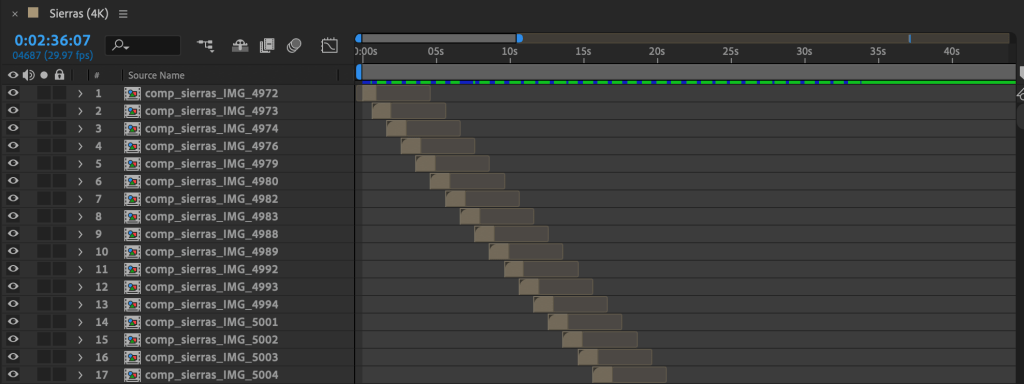
}Process output to stagger the layers and add transitions.
This part was tricky since you can’t add transitions directly from the code. You must know the property name to dynamically add or remove it. Ugh. It was a pain, but we got there.
function processFinalCompLayers() {
  finalComp.openInViewer()

  var effectsProperty = 'ADBE Effect Parade'
  var dissolveProperty = 'ADBE Block Dissolve'
  var durVisible = Number(secondsPerImage.text)
  var durTrans = Number(secondsPerTransition.text)
  var durTotal = durVisible + durTrans

  var compTotalTime = durVisible * finalComp.numLayers
  finalComp.duration = compTotalTime + 1
  finalComp.time = 0
  finalComp.workAreaStart = 0.0
  finalComp.workAreaDuration = finalComp.duration

  for (var i = 0; i < finalComp.numLayers; i++) {
    var layer = finalComp.layers[i + 1]

    var pointStart = i * durVisible - durTrans
    var pointOut = pointStart + durTotal
    var transStart = pointOut - durTrans

    layer.startTime = pointStart
    layer.inPoint = 0
    layer.outPoint = pointOut

    if (layer(effectsProperty)(dissolveProperty)) {
      layer(effectsProperty)(dissolveProperty).remove()
    }
    layer(effectsProperty).addProperty(dissolveProperty)
    var dis = layer.property(effectsProperty)(dissolveProperty)

    dis.property('Feather').setValue(100)

    var transComplete = dis.property('Transition Completion')
    var keyIn = transComplete.addKey(pointStart)
    var keyTransStart = transComplete.addKey(transStart)
    var keyOut = transComplete.addKey(pointOut)

    transComplete.setValueAtKey(keyIn, 0)
    transComplete.setValueAtKey(keyTransStart, 0)
    transComplete.setValueAtKey(keyOut, 100)
  }
}
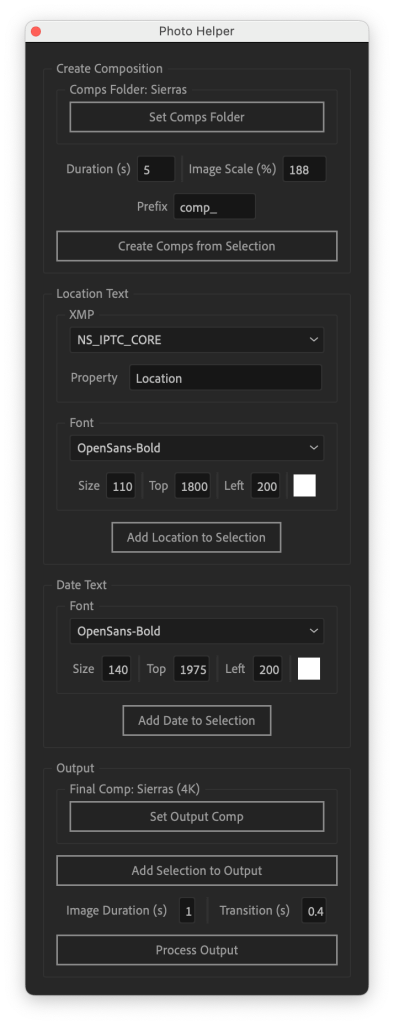
Make a sweet UI to make things easier.
Running all of this in the command prompt was painful. Luckily, ExtendScript has a UI library called ScriptUI that allows you to build little plugin panels. Getting it to look nice was incredibly difficult, so I settled for “ugly but effective.”
Final Thoughts
Overall, I’m thrilled with how this project turned out. The codebase is incredibly sloppy and not an indicator of my usual quality. Still, I’m making it available on GitHub nonetheless. This project made me feel more connected with Madison’s hike and gave me something to do besides sitting around missing her all day. This is one of the few oddball projects I’ve taken on over the years that actually turned out close to the original vision. Typically, things go completely sideways, and we have to adjust our expectations. With this, I made something reproducible, semi-reasonable for someone to use, and a valuable time-sink. If I could go back and do it all again, I definitely would. I saved the resources I stumbled across in case somebody else (or me) goes down that same rabbit hole.
I’m satisfied with it, I hope Madison is happy with it, and I hope everybody out there enjoys the videos and maybe peeking behind the curtain on how we made them.
Output Videos
Helpful Resources
These were extremely helpful while working on this project.
- JavaScript Tools Guide CC
- After Effects Scripting Guide
- NTProductions GitHub Examples
- ChatGPT (for asking rough questions about how to do things)
- ExtendScript Toolkit on GitHub
I didn’t use these directly but found them helpful later.
- After Effects Snippets – https://github.com/ff6347/after-effects-script-snippets
- Repo with tons of ExtendScript content – https://github.com/ff6347/extendscript
- Super Helpful ExtendScript Wiki – https://github.com/ExtendScript/wiki/wiki
